
| xxxxxxxxxxxxxxxxxxx |
Use a Mini-Greenhouse for Greater Success When GraftingBob G Cannon
II
The use of a mini-greenhouse when
grafting is not new, I first saw them used by Bill Whitman in the
1980's, but many who could use them do not. Most simply a
mini-greenhouse is a plastic bag placed over the graft union. They
have been proven to work on containers up to 5 gallons and larger.
Why It WorksPlacing the healing graft inside a
sealed plastic bag increases the chance of a successful union forming
primarily by preventing it from drying out. The graft is also
protected from excess moisture. Protection from airborne disease and
insect pests is also provided. Stakes are used to keep the bag from
touching the stem or any remaining leaves on the grafted plant. Lastly
the temperature is stabilized somewhat through protection from wind
and the trapped air within the bag. This combination of factors:
higher humidity, protection from drying, reduced disease exposure,
more stable temperatures, all have a synergistic effect to give
grafted pieces a better chance to form a successful union.
Healing times are shortened in some cases due to the favorable conditions provided. ProcedureMake your graft in the normal way,
securing the cut surfaces firmly so that they can form a union. Using
this method is not a cure for poor grafting habits. Grafts may be made
with rubber strips, plastic tape string or other materials. Parafilm
is usually not necessary as the bag provides the same protections
associated with it.
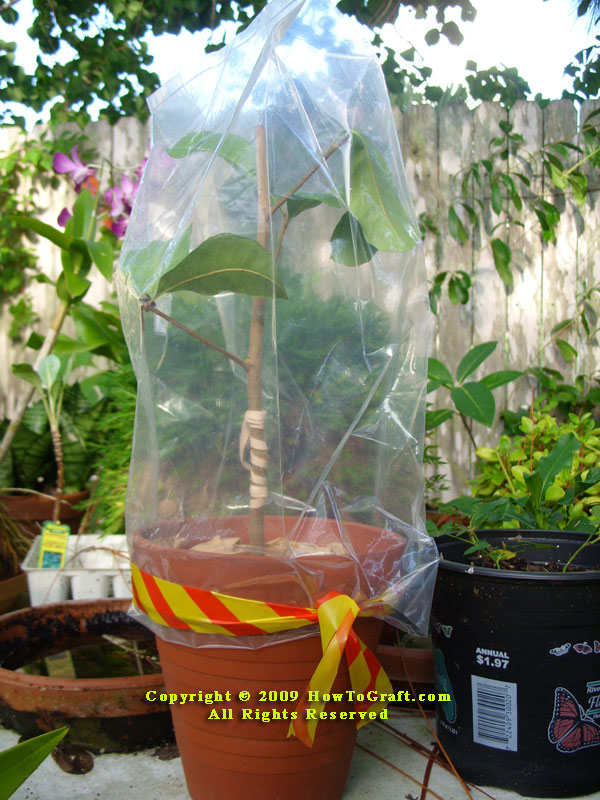
1 - Seal the bag tightly to the pot with plastic tape or string Add two or three stakes to the container spaced equidistant around the perimeter. A clear plastic bag that is long enough to reach the container is then placed over the plant and sealed to the container with plastic tree tape or string. If the bag is not long enough place the stakes close to the stem and secure the bag to the stem below the graft. Inflate the bag before placing it over the stakes and graft. Some growers believe that filling the bag with puffs of air increases the CO2 content and assists in the grafting process. The bag should not be in contact with the graft and the stakes should be placed so that it touches few, if any, of the remaining leaves. It is important that the bag be sealed and I have, on occasion, placed the stakes outside the bag and used clips to hold the bag away from the plant inside. 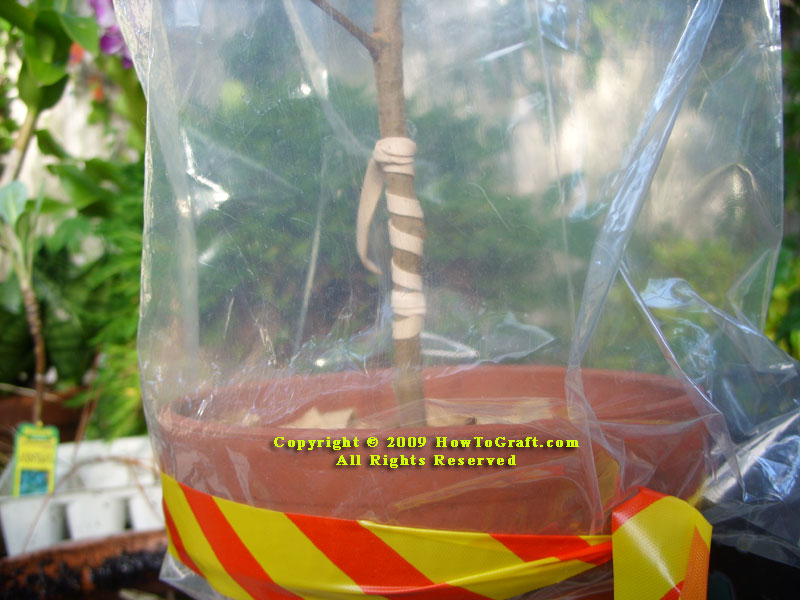
2 - Closeup of the graft protected by the bag This even works on some trees being reworked. I watched Ron Hensley rework a grapefruit in this way. The tree was trimmed down to about 4 foot tall; this resulted in there being four main stubs. The stubs sprouted profusely and all but the best-placed 4 to 6 sprouts on each were left while the rest were pruned away. As this was a mature tree, with an active root system, the sprouts were of a good diameter and grew quickly. 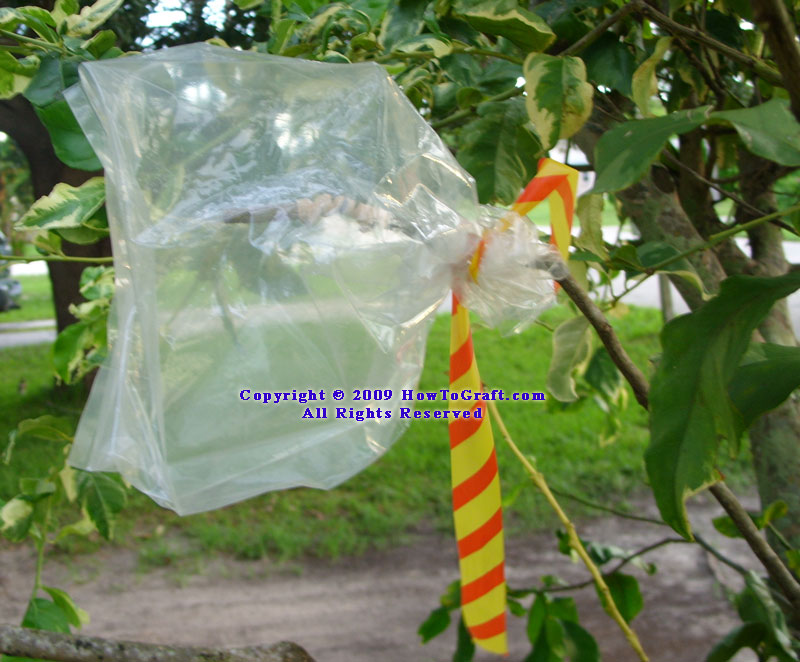
3 - Here a bag protects a graft in a tree - remember to protect from direct sun When the sprouts were about 8-12 inches long they were grafted even though the wood was still relatively green. A single graft on each sprout was made using a different variety of Citrus. Since it was impractical to place a bag over the entire tree individual grafts were bagged. Nearby trees did not provide complete protection from direct sun and electrical metallic tubing (EMT) was used to support a cloth sheet to provide complete sun protection. When healed the grapefruit had become a fruit cocktail' tree that bore several varieties of citrus. AftercareWhen using this method the bag covered grafts must be protected from direct sun. Bags exposed to direct sun will heat up to lethal temperatures fairly quickly and the grafts will fail.A short period of hardening off is also required as new growth produced in the bags is tender. When the graft is ready, healed properly, open the bottom of the bag for 2 to three days. After this period remove the top of the bag or cut slits in the top and sides remove completely after another few days. The exact time will differ some with species and local conditions, each grower learns and adapts what works best for them. This technique works well with tropical and subtropical species such as mango, avocado, white sapote, lychee and others. It might also benefit some temperate species but the author has not tried it on any. It has also been used to assist with recalcitrant cuttings and seeds. |
Grafting Supplies coming soon!
Our Plant Grafting email group is: Just a click away! Send your email here to subscribe: PlantGrafting-subscribe@yahoogroups.com Check out our groups: Here! If you are interested in learning about rare fruit you might visit Quisqualis. More information on our Grafting DVDs here soon! More links coming soon! direct. Back to first page |